Overview
In this article, you will learn how to use the Self Check-Out system for your clients.
Before You Start
You will need to have the facilities built that you want to use to check a member out of. If you are checking someone out as a Simple Facility Check-Out, this is all you will need.
To check a member out of a membership, you will need to have built and enrolled the member into a membership.
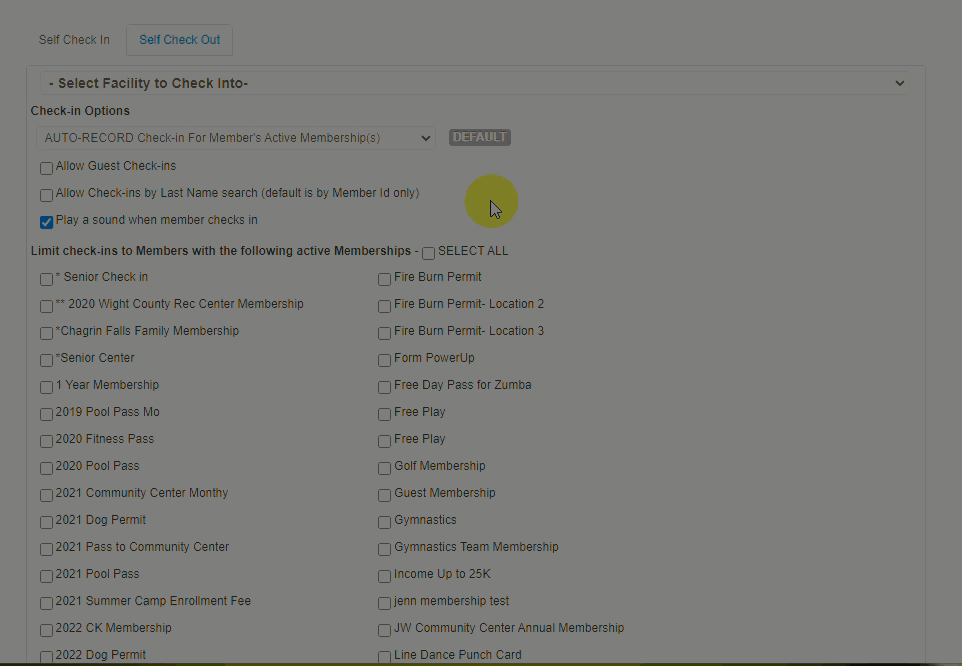
From the Dashboard, click on the Facility tab, select Self Check-in from the facility sub-menu, and then click the Self Check Outs tab.
How Do I use Self Check-Out?
One option for check-outs is the Self Check-Out feature. This is normally used when you do not have someone at the front desk, and you want members to check themselves out. They can do this by either manually entering their Member Id or scanning it via a barcode reader/scanner. You can also optionally allow people to check themselves out using their last name.

Notes:
Once you have entered Self Check-Out mode, the PC/tablet is locked out and the user cannot access the other applications on the PC/tablet until Exit Self Check-out is clicked and the password of the user that set up the Self Check Out page is entered.
Also helpful is What Type of Barcode Reader Works with RecDesk?